Shield Your Thoughts: Building an Encrypted Note App with React and Pangea Authentication

Teri Eyenike is a software developer with 3+ years of experience in web development and technical writing based in Lagos, Nigeria.
I am a software developer and technical writer that builds products with modern technologies and treats content as a product.
When he is not coding or writing, I love to do street photography with my mobile, kayak, and travel to see the world.
Say hi to him on Twitter at @terieyenike
Protecting your thoughts and ideas from external entities is vital when building an app that needs your permission through email and passwords and possibly an extra level of protection like 2FA (two-factor authentication) before granting access.
Have you ever considered the safety of your users in securing the app they use? If you're seeking a solution without needing to develop one from the ground up, Pangea AuthN facilitates seamless integration into applications.
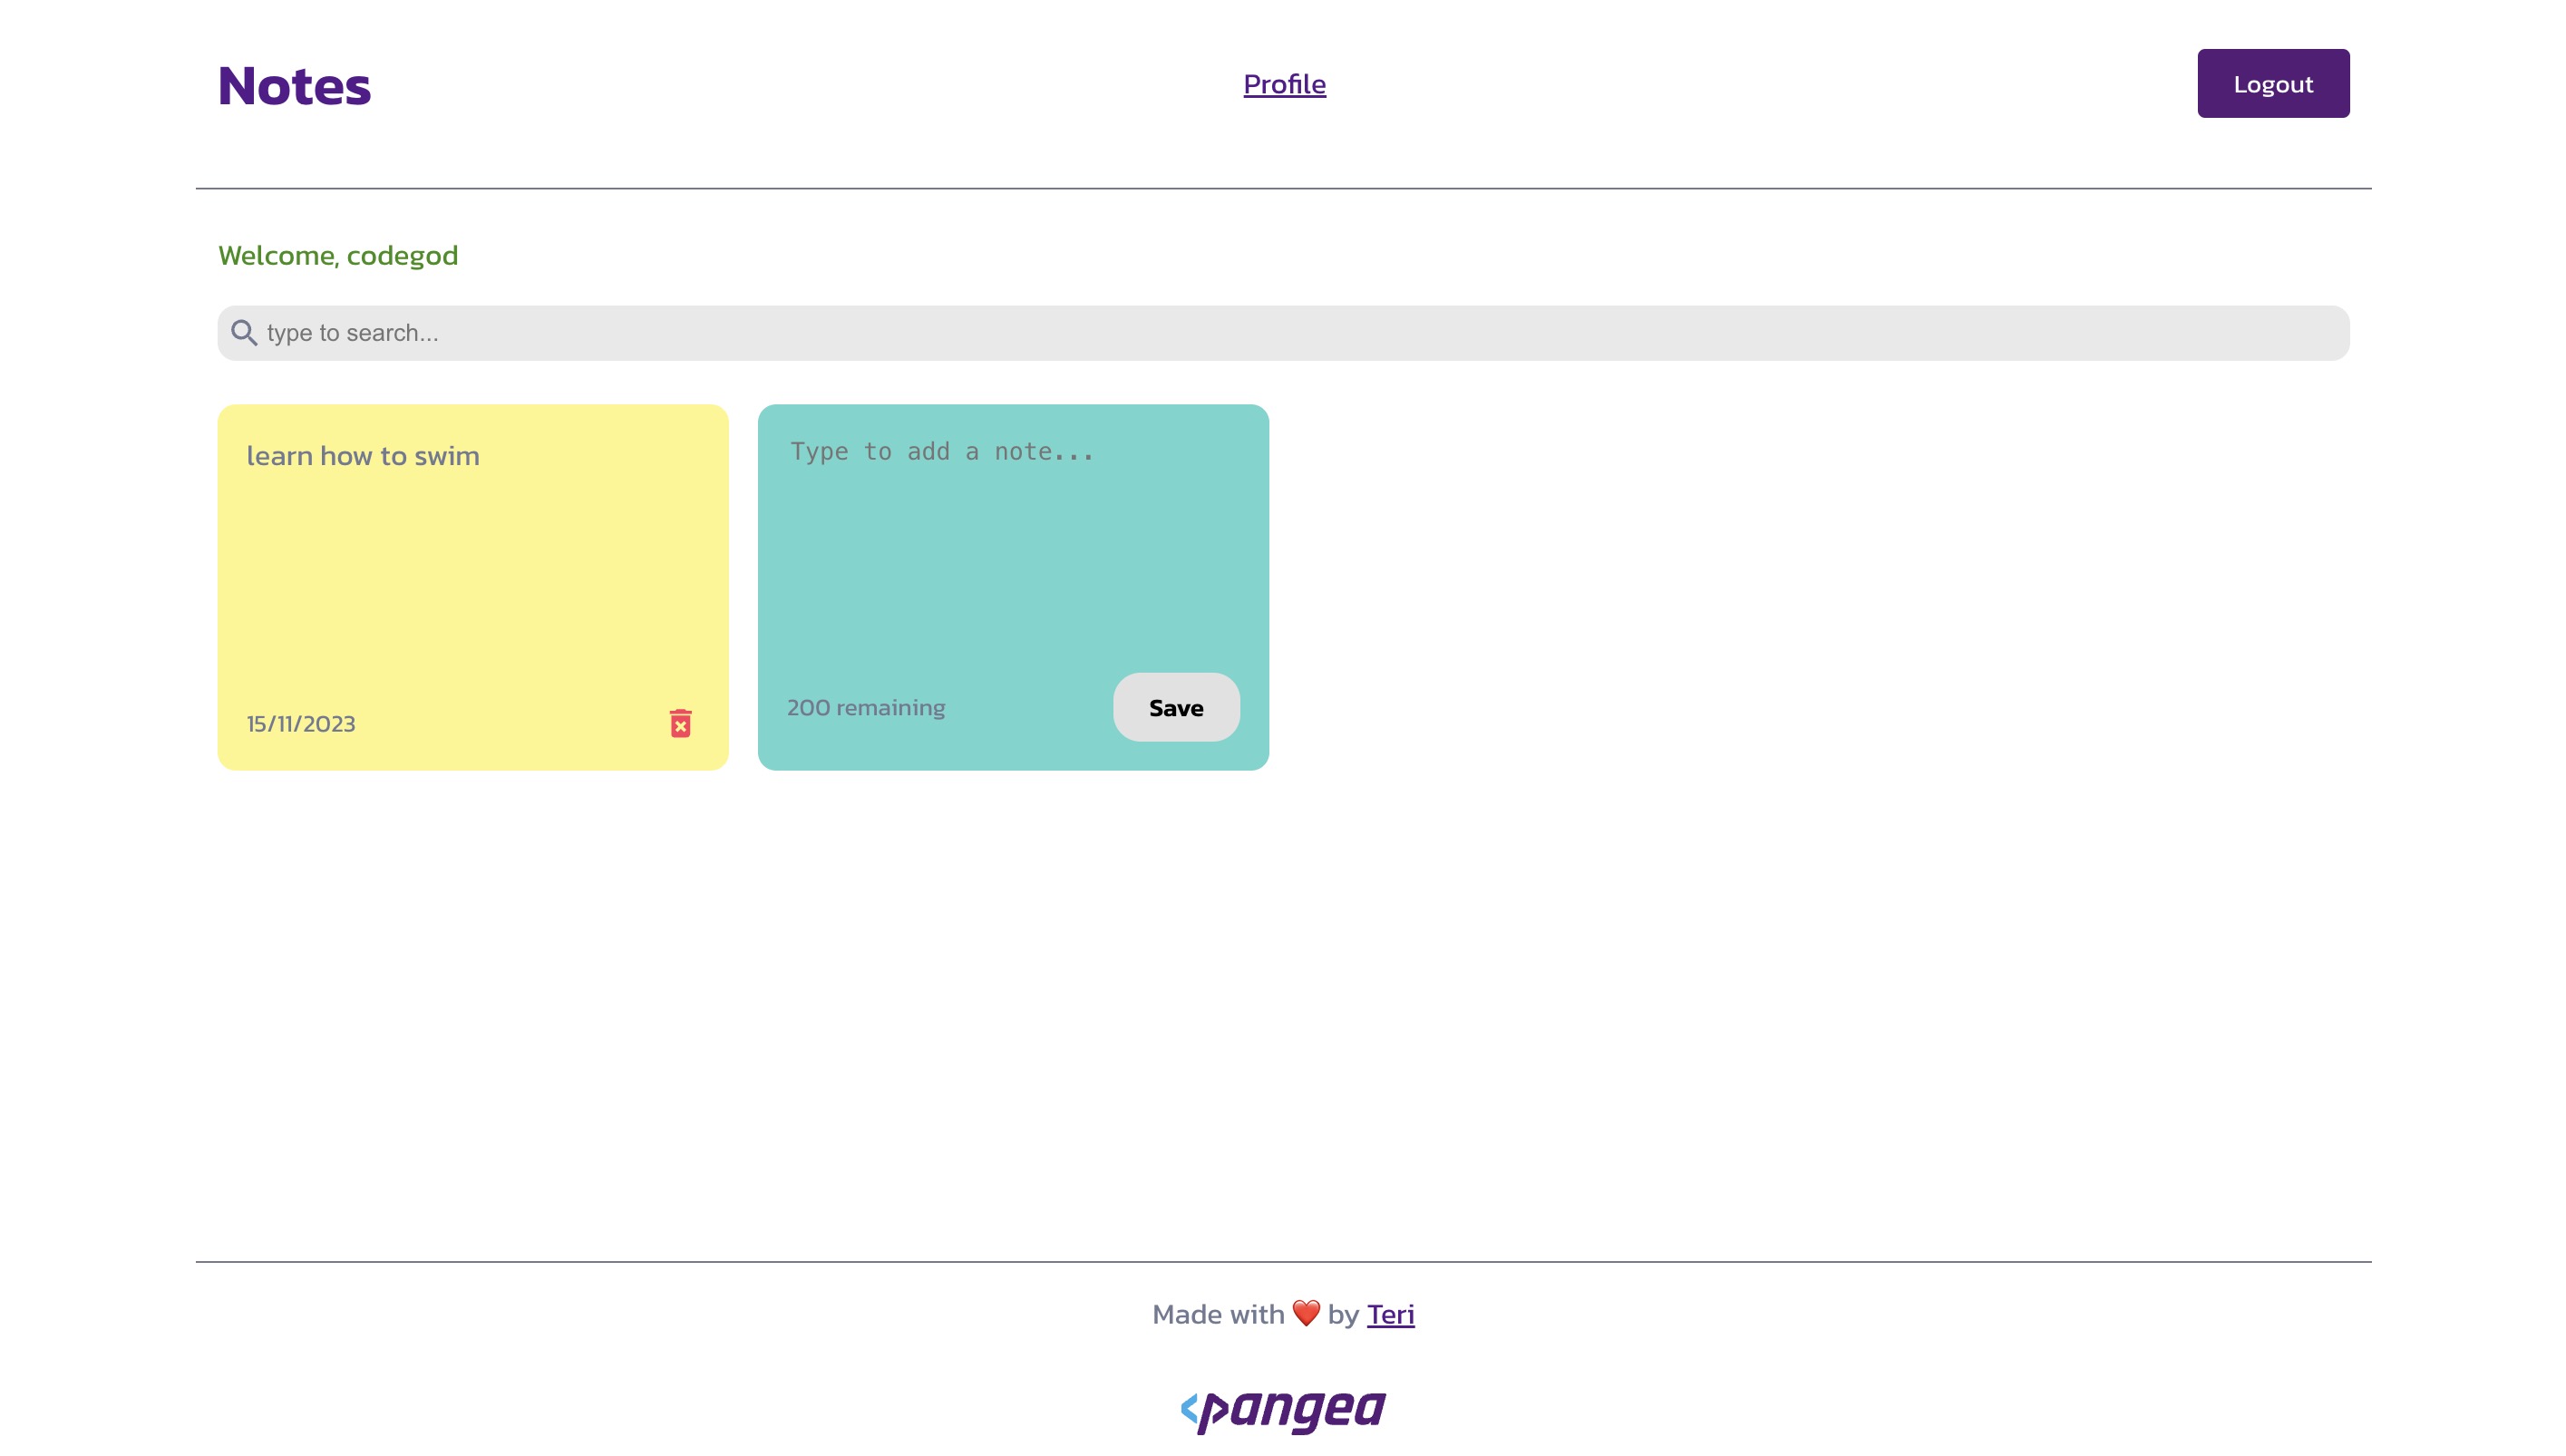
In this article, you'll create an application that allows you only to create and view the notes once validated to use the app after login.
Securing your application with AuthN
What is the function of using Pangea's AuthN (authentication)? AuthN is a cloud-based authentication service, and it is one of the numerous services offered to customers on the Pangea platform, an end-to-end authentication flow for securing access to your application and login, session management, and user management through hosted pages and APIs.

Authentication restricts access to an app's data and ensures the person you claim to be is truly you without exposing it to the wrong hand.
Prerequisites
To complete this tutorial, you need a Pangea Cloud account. If you don't have one already, sign up to try Pangea for free and get up to $5 credit.
The other requirements for this tutorial include:
Familiarity with React and TypeScript
Knowledge of using SCSS for styling
Vercel for hosting web pages
If you don't have Node.js installed on your local machine, please install it before continuing.
Demo
Check out the live demo app here.
GitHub repository
Want to check out the code for this project? It is in this repository.
Setting up the demo application
Start by downloading or cloning the demo application from this repository. Open up your terminal and cd into the pangea-example-react-authn directory.
Install the project's dependencies using the command:
yarn install
Now, to remove the git remote and make it yours, run this command:
git remote remove origin
Running the command above will give you access rights when you want to push this repo to GitHub without issues.
Next, install the nanoid package, which is responsible for generating a random unique string ID.
yarn install nanoid
Start the development server to confirm the loading of the app in the browser on http://localhost:3000.
yarn start
Using Pangea AuthN Service
When you log in to your Pangea user console, create a new project or use the initial setup project already configured when you created a new account.

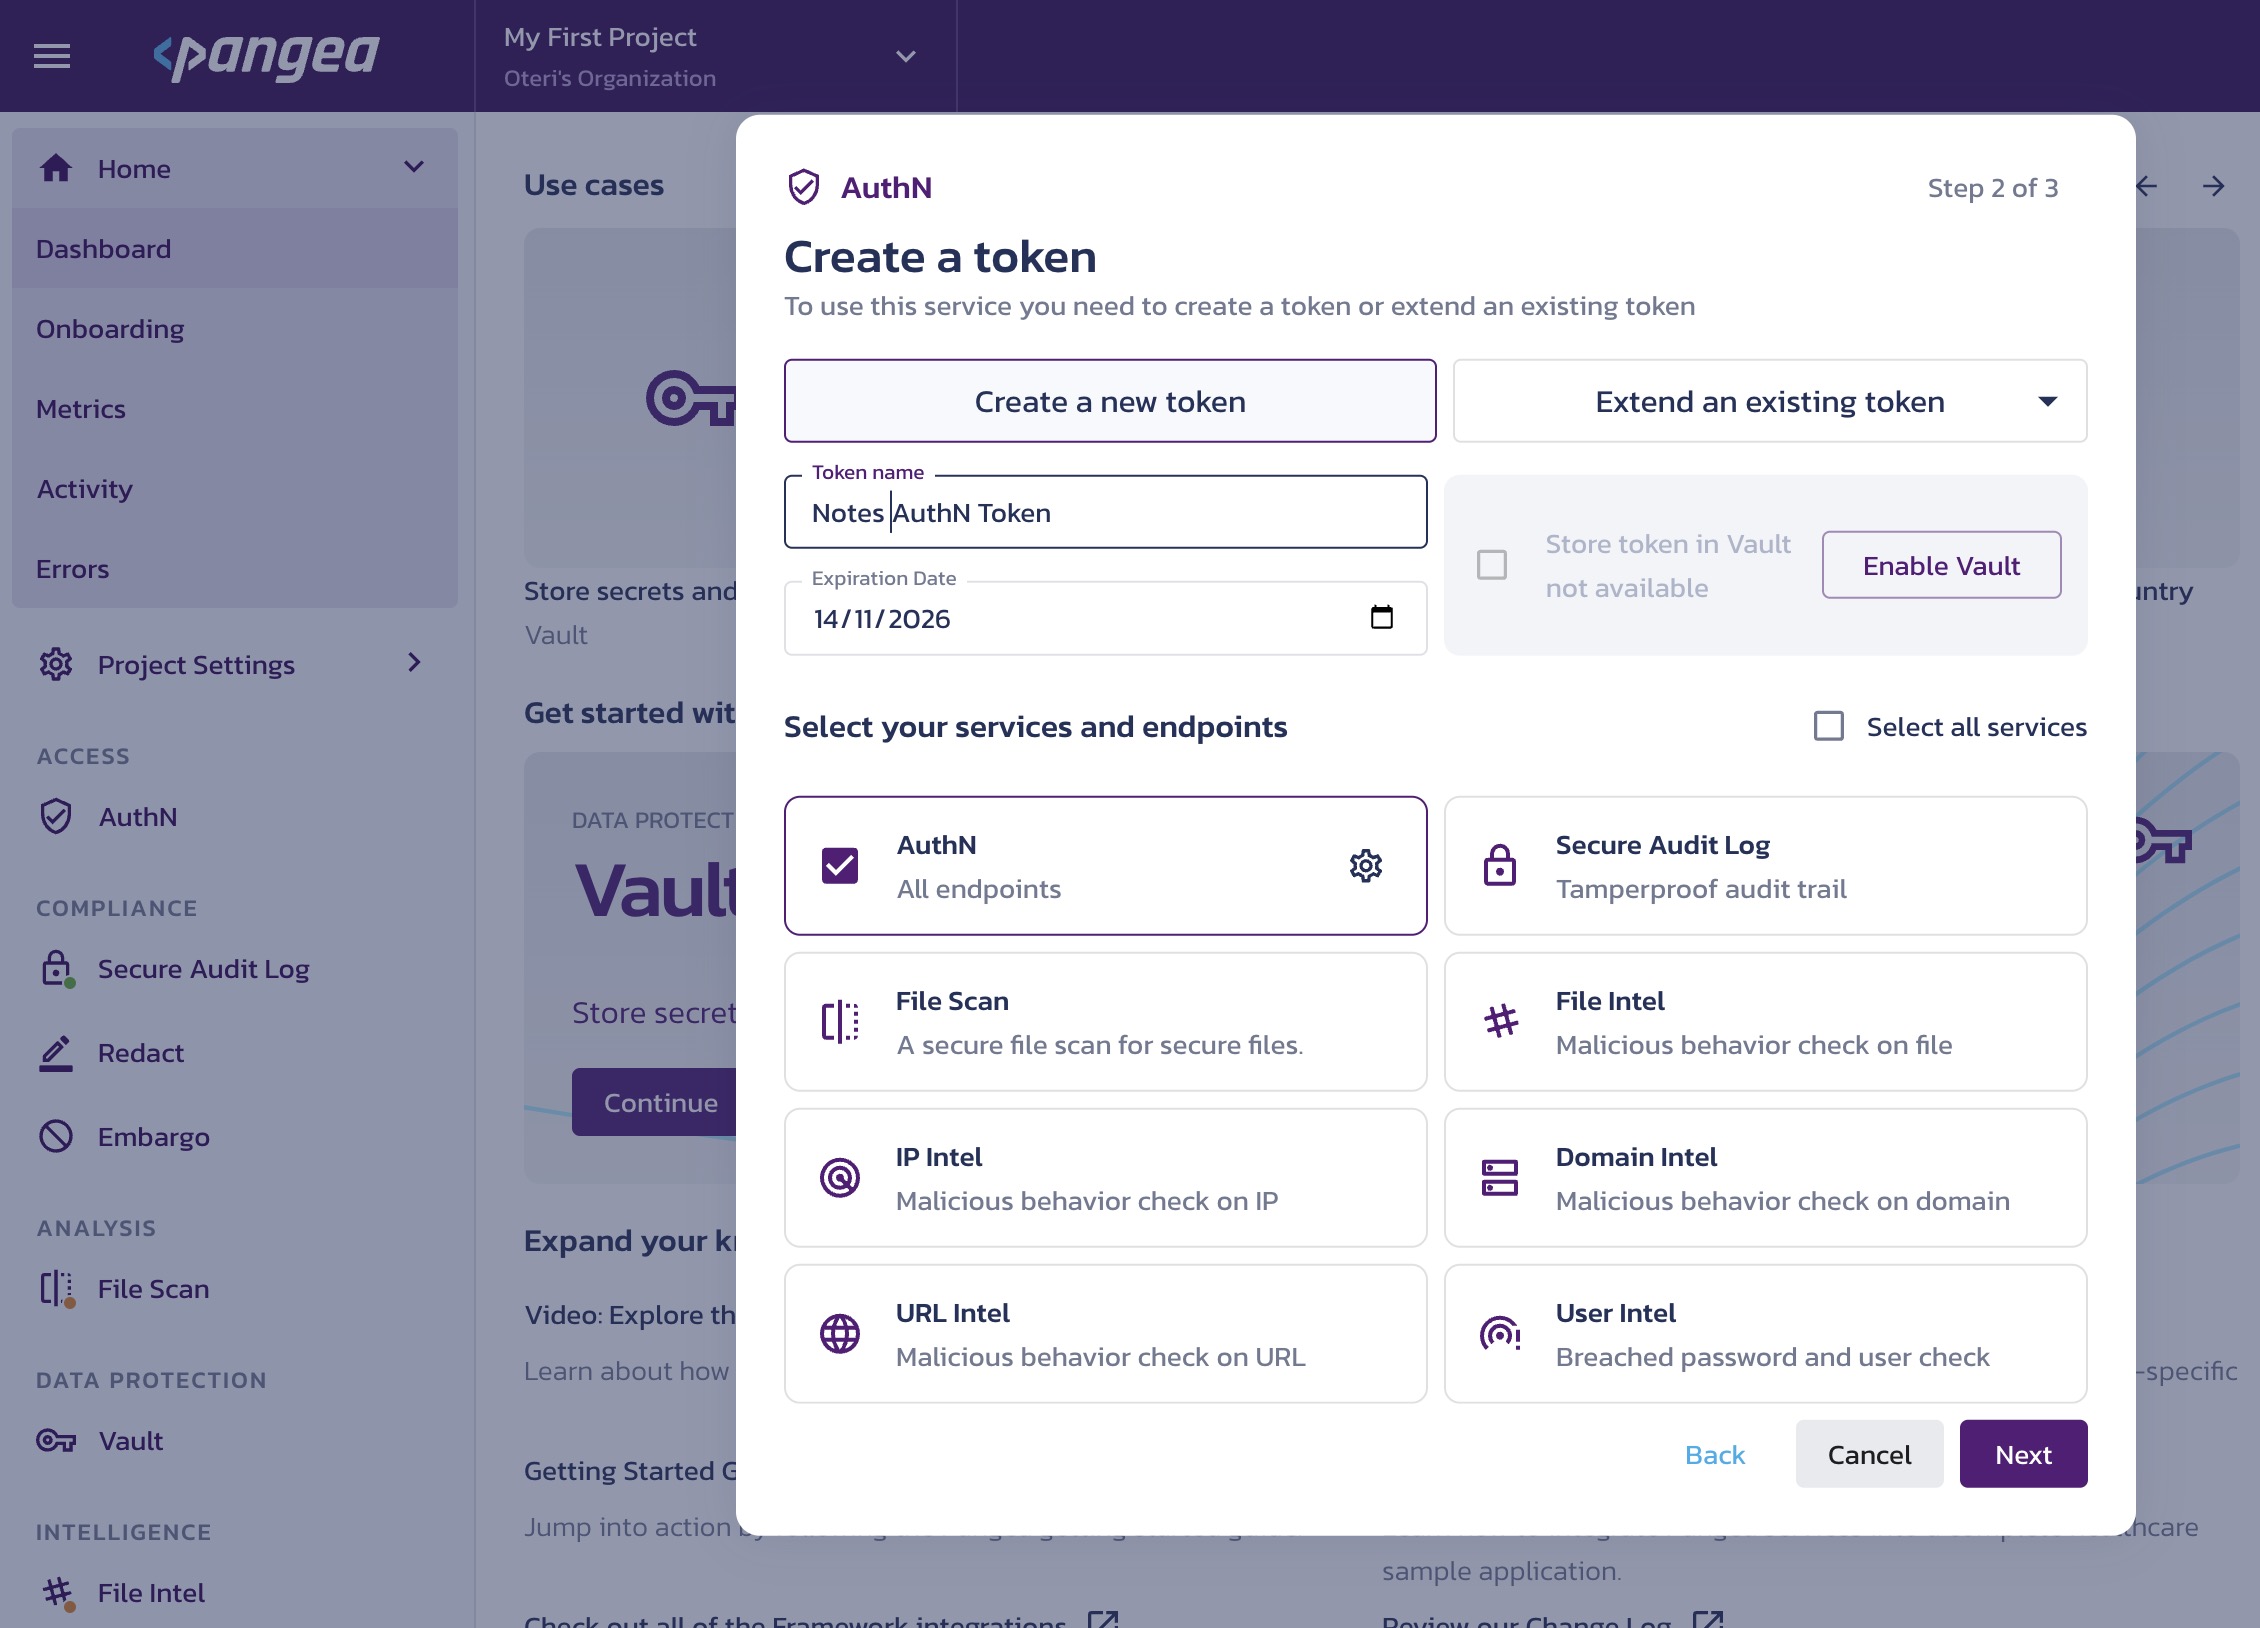
Enable the service and create a token
On the left pane of your console, under the Access tab**,** click on AuthN and follow these instructions to enable the service.
Configure the app environment
Before configuring your app for communication with the Pangea service, you must set the following environment variables: token and domain, which are visible on your user console.

To set this up in your terminal, follow these steps.
Add variables to the env file
After generating the variables in the Pangea User Console, rename the existing .env.template file to .env in your React app codebase. Add and replace the following values as shown from your dashboard:
REACT_APP_CLIENT_TOKEN="{PANGEA_TOKEN}"
REACT_APP_PANGEA_DOMAIN="{AUTHN_API_URL}"
REACT_APP_LOGIN_URL="{AUTHN_LOGIN_URL}"
The AUTHN_LOGIN_URL is the Hosted Login value.
Other configuration settings
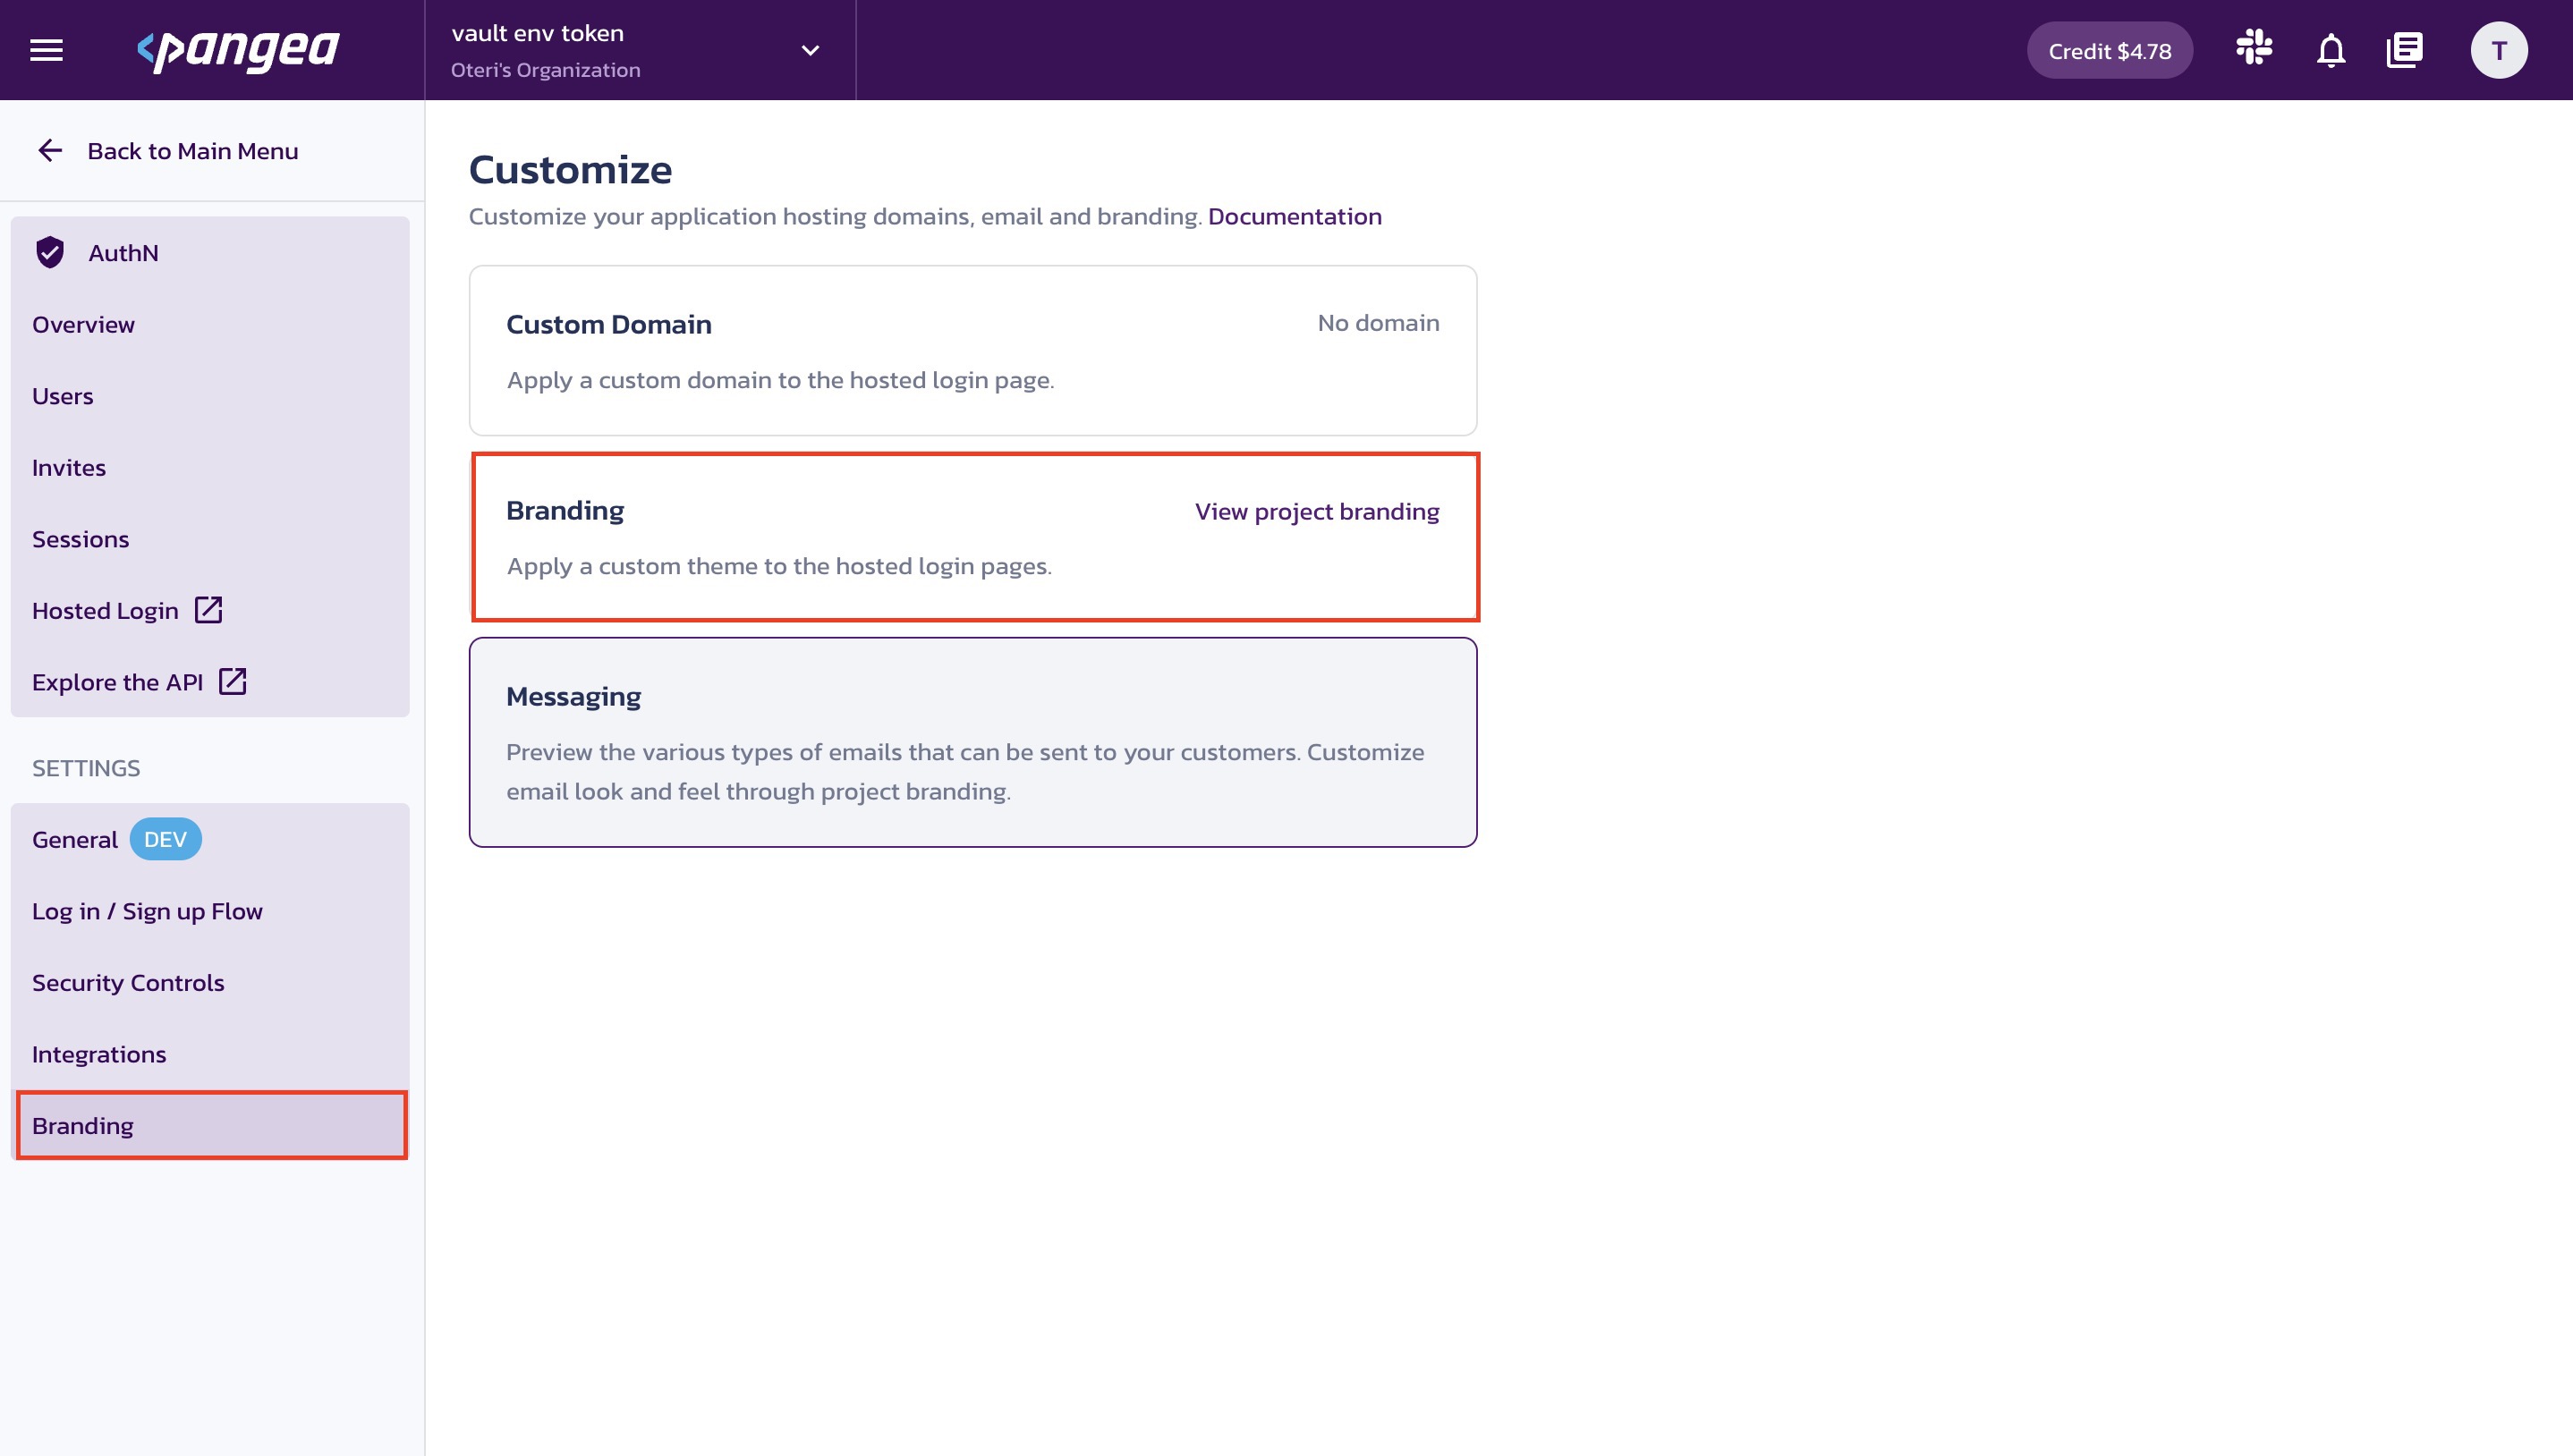
The AuthN documentation has all the information you need, from customizing your login screen to suit your brand, like color, logo, and more. In your console, click on branding and select the View project branding to customize the login/signup flow.
Also, you can add other social logins like Google and GitHub or the traditional username and password flow.
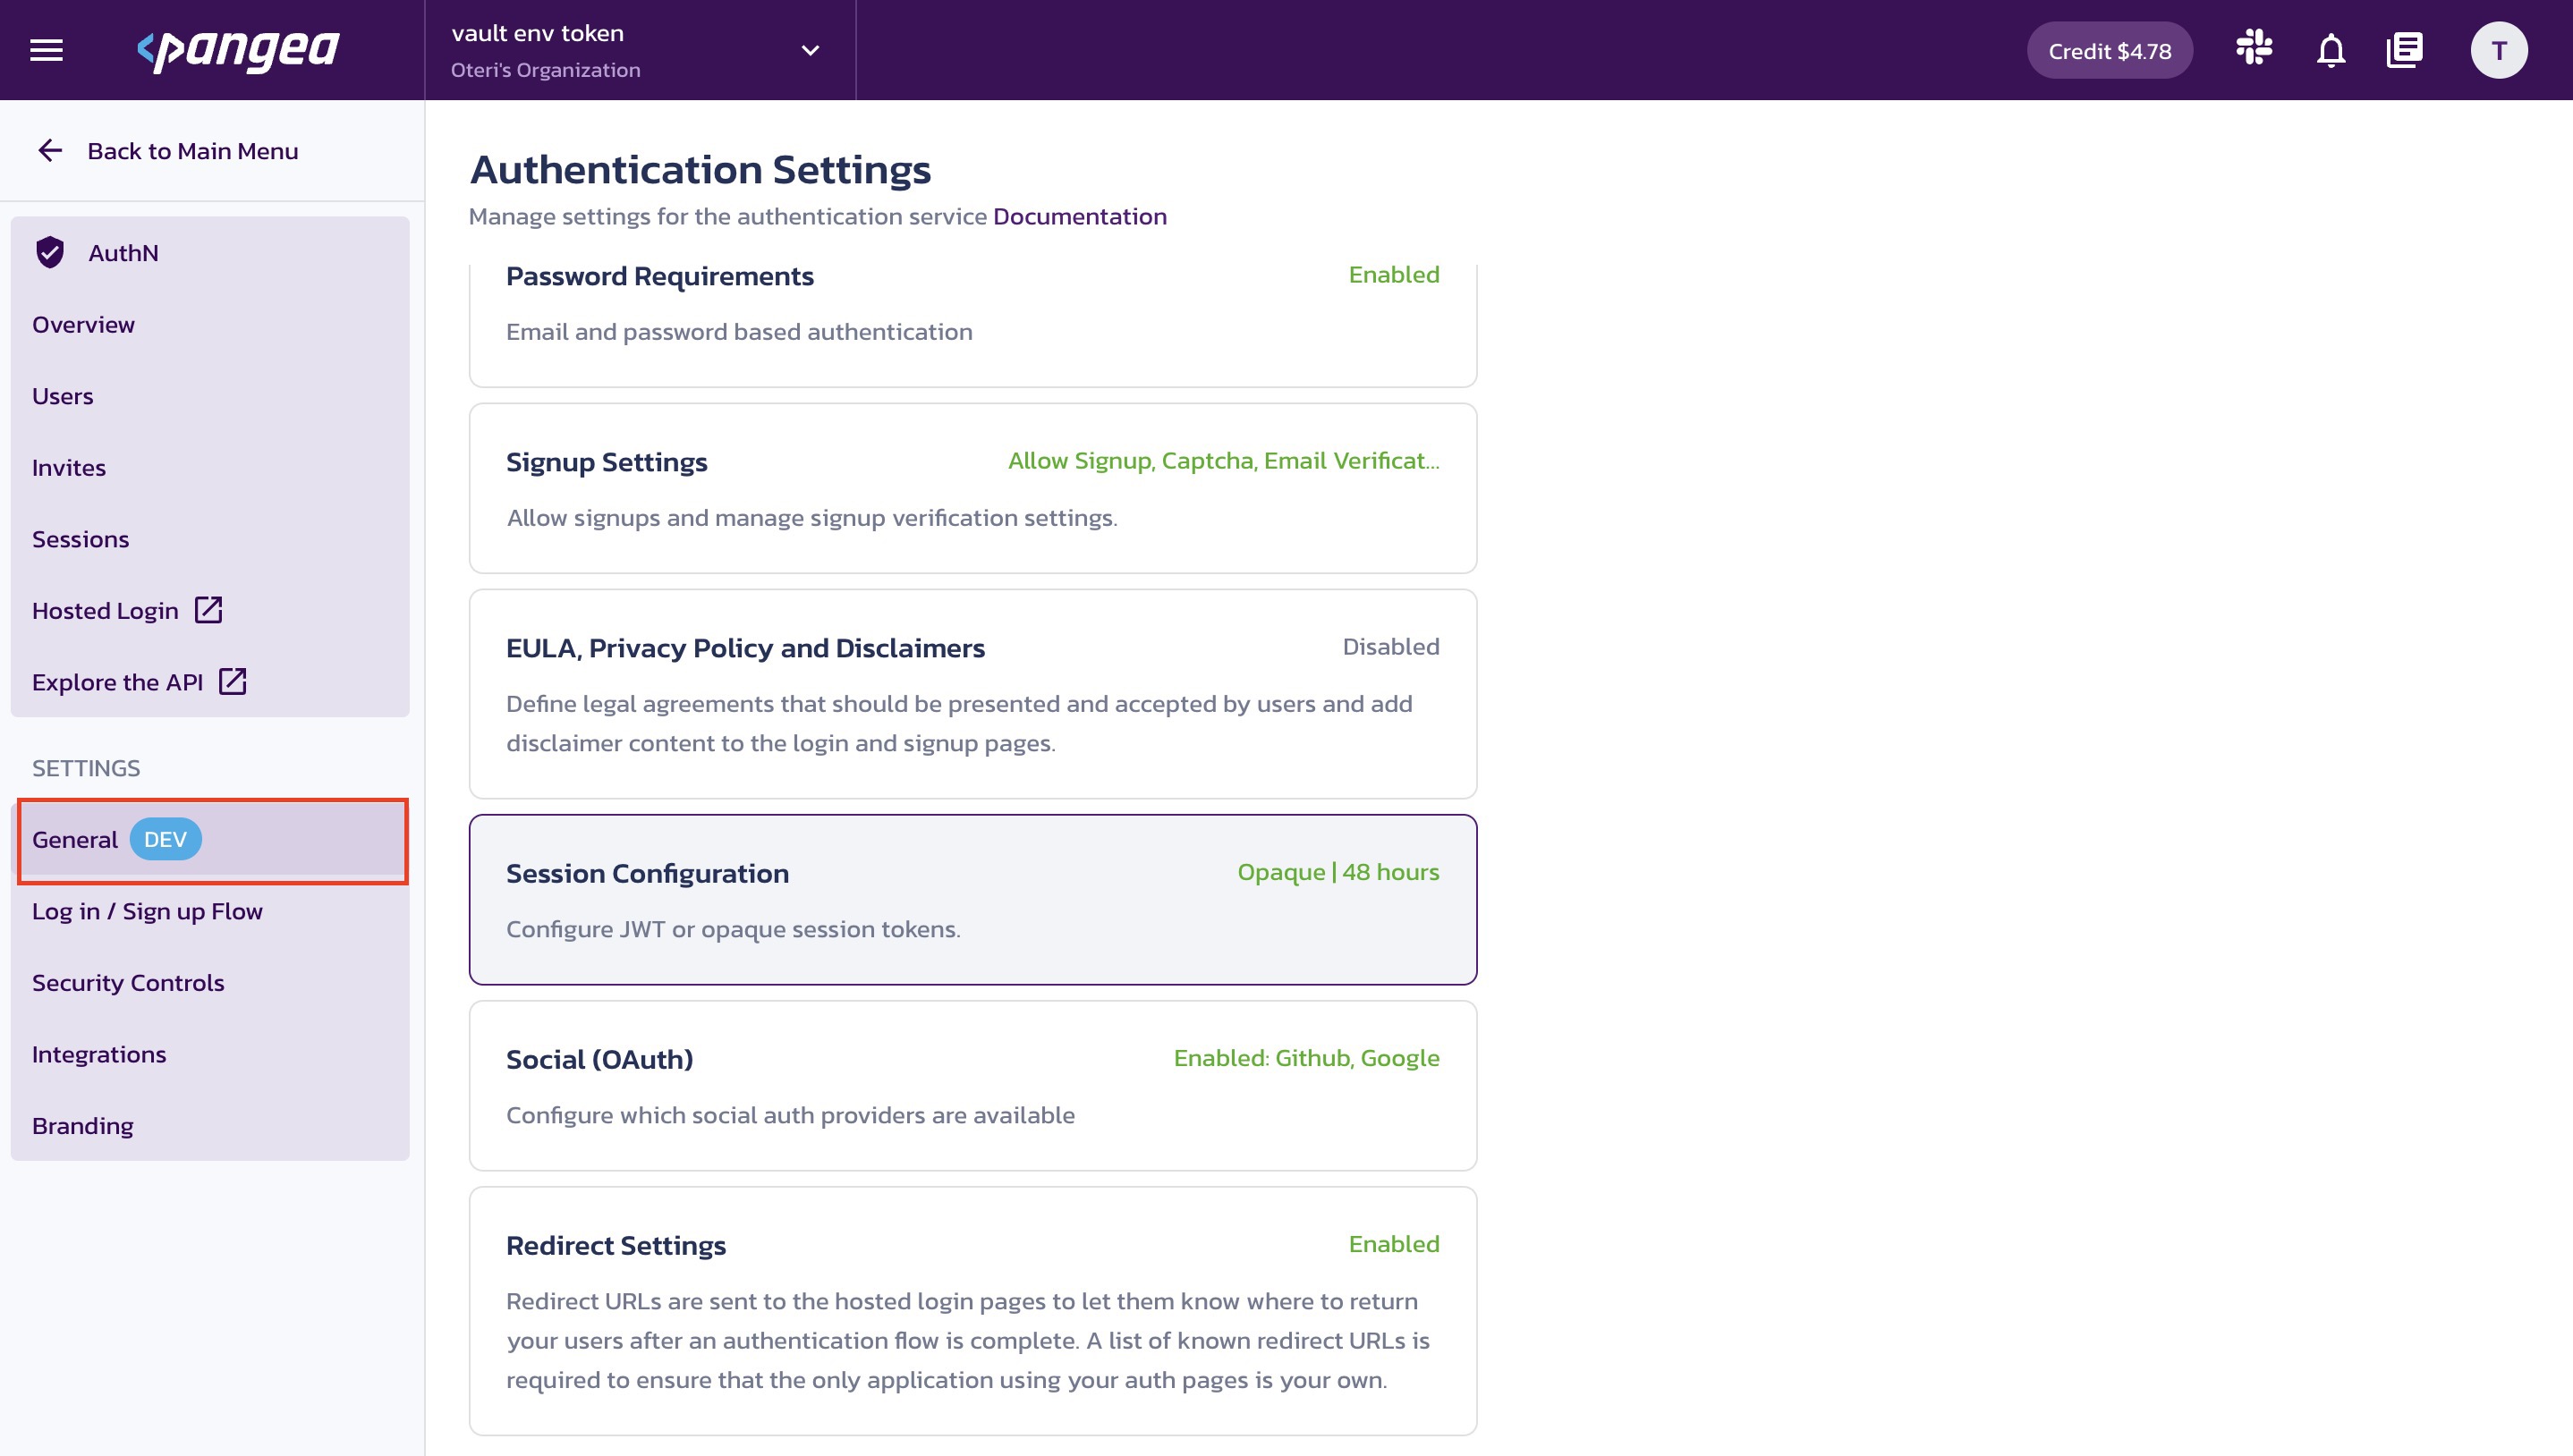
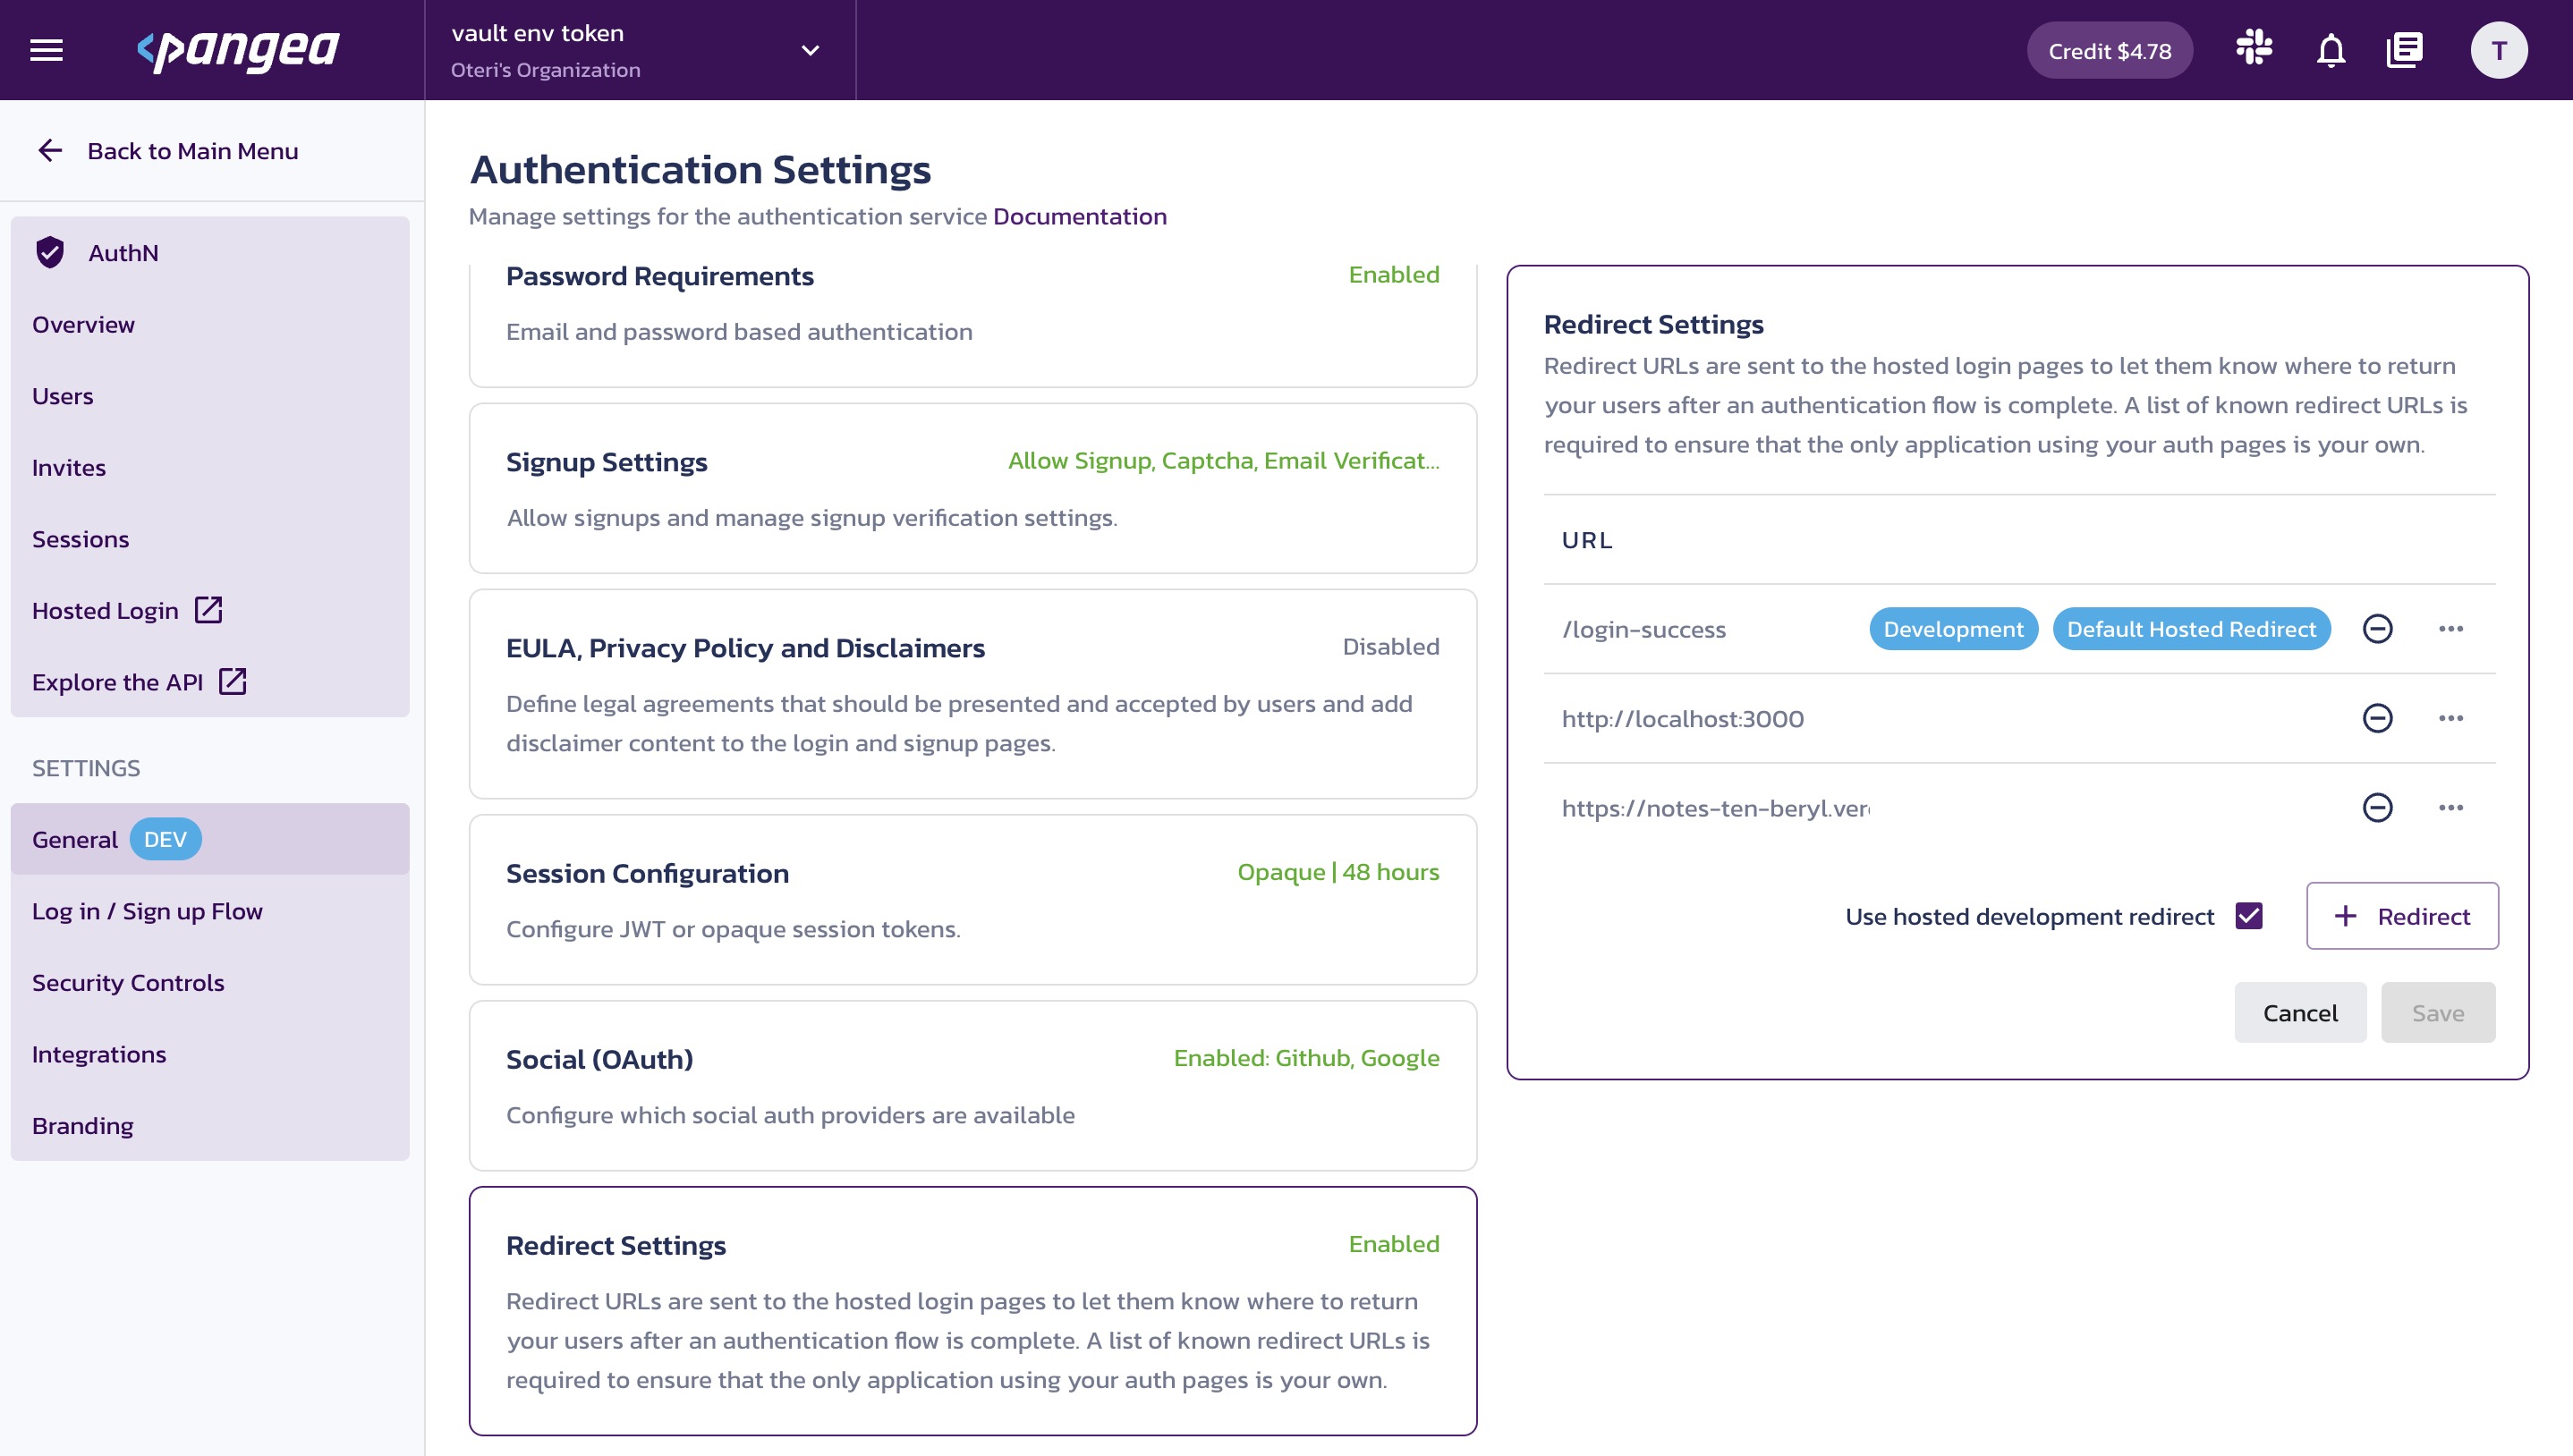
Set up a redirect
Redirect URLs are used to hand off users from the Pangea-hosted AuthN pages back to your app.
To do this, click on the Redirect Settings and set the known redirect URL as http://localhost:3000 which is the development port server in React. Later, when you host your app in Vercel, you can also add the URL provided to the list of acceptable redirects.
Integrating AuthN into the frontend
Before going deep to integrate the authentication service in the app, let's do the following.
In the styles.scss file under the scss folder, copy and paste these styles using this link:
https://gist.github.com/Terieyenike/232782ae5e31a9abb37ef82a66f3aaa0
Next, let's create the following files in the components directory and afterwards update the other components accordingly:
AddNote.tsx
Note.tsx
NotesList.tsx
Search.tsx
In the Footer component, copy-paste this code:
src/components/Footer/index.tsx
const Footer = () => {
  return (
    <div className="footer">
      <p>Made with ❤️ by <a href="https://twitter.com/terieyenike" rel="noopener noreferrer" target="_">Teri</a></p>
      <p>
        <img src="./pangea-logo.svg" alt="Pangea" />
      </p>
    </div>
  );
}

export default Footer;
Next, the Header component would need a little adjustment in its navigation.
src/components/Header/index.tsx
import { MouseEvent } from "react";
import { Link } from "react-router-dom";
import { useAuth } from "@pangeacyber/react-auth";

const Header = () => {
  const { authenticated, login, logout } = useAuth();

  const handleLogout = (e: MouseEvent) => {
    e.preventDefault();
    logout();
  }

  return (
    <div className="header">
      <h1>
        <Link to='/' style={{textDecoration: "none"}}>Notes</Link>
      </h1>
      {authenticated && (
        <div className="nav">
          <Link to="/profile">Profile</Link>
        </div>
      )}

      {authenticated ? (
        <button onClick={handleLogout}>Logout</button>
      ) : (
        <button onClick={login}>Login</button>
      )}
    </div>
  );
};

export default Header;
There is no need to update the code for the Router and Status components. So we would ignore them.
src/components/AddNote.tsx
import { useState, ChangeEvent } from "react";

interface AddNoteProps {
  handleAddNote: (text: string) => void;
}

const AddNote: React.FC<AddNoteProps> = ({ handleAddNote }) => {
  const [noteText, setNoteText] = useState<string>("");
  const characterLimit = 200;

  const handleChange = (e: ChangeEvent<HTMLTextAreaElement>) => {
    if (characterLimit - e.target.value.length >= 0) {
      setNoteText(e.target.value);
    }
  };

  const handleSave = () => {
    if (noteText.trim().length > 0) {
      handleAddNote(noteText);
      setNoteText("");
    }
  };

  return (
    <div className="note new">
      <textarea
        cols={10}
        rows={8}
        value={noteText}
        placeholder="Type to add a note..."
        onChange={handleChange}
      ></textarea>
      <div className="note-footer">
        <small>{characterLimit - noteText.length} remaining</small>
        <button className="save" type="submit" onClick={handleSave}>
          Save
        </button>
      </div>
    </div>
  );
};

export default AddNote;
The code snippet above is responsible for the following:
It creates a new note with a character limit of 200 and the word count on every change in the
textareaelementThe component makes use of the
useStatehook that returns an array with 2 itemsThe first element,
noteTextrepresents the value of our stateThe second one,
setNoteTextis a setter function that updates the state variable once a new list item is createdThe function
handleSaveadds a new note and clears the result immediately by clicking on the save button
src/components/Note.tsx
import { MdDeleteForever } from "react-icons/md"

interface NoteProps {
  id: string
  text: string
  date: string
  handleDeleteNote: (id: string) => void
}

const Note = ({ id, text, date, handleDeleteNote }: NoteProps) => {
  return (
    <div className="note">
      <span>{text}</span>
      <div className="note-footer">
        <small>{date}</small>
        <MdDeleteForever size={"1.3em"} className="delete-icon" onClick={() => handleDeleteNote(id)} />
      </div>
    </div>
  )
}

export default Note
The code above displays the actual notes with the props from the NotesList component and a delete icon that triggers the removal of the note with its specific id.
src/components/NotesList.tsx
import Note from "@src/components/Note";
import AddNote from "@src/components/AddNote";

interface NotesListProps {
  notes: {
    id: string;
    text: string;
    date: string;
  }[];
  handleAddNote: (text: string) => void;
  handleDeleteNote: (id: string) => void;
}

const NotesList: React.FC<NotesListProps> = ({ notes, handleAddNote, handleDeleteNote }) => {
  return (
    <div className="notes-list">
      {notes.map((note) => (
        <Note key={note.id} {...note} handleDeleteNote={handleDeleteNote} />
      ))}
      <AddNote handleAddNote={handleAddNote} />
    </div>
  );
};

export default NotesList;
Here, the following occurs:
Import the components,
NoteandAddNoteThe interface
NotesListPropsdescribes the expected structure of the properties that the component NoteList receivesThe items are iterated using the notes array, and their props passed along in the Note component
The
AddNotecomponent takes in a prop as well
src/components/Search.tsx
import { ChangeEvent } from "react";
import { MdSearch } from "react-icons/md";

interface SearchProps {
  handleSearchNote: (searchText: string) => void;
}

const Search: React.FC<SearchProps> = ({ handleSearchNote }) => {
  return (
    <div className="search">
      <MdSearch className="search-icons" size="1.3em" />
      <input
        type="text"
        placeholder="type to search..."
        onChange={(e: ChangeEvent<HTMLInputElement>) => handleSearchNote(e.target.value)}
      />
    </div>
  );
}

export default Search;
The Search displays an input with the search icon to search the entire result page of the note app.
If you preview the app port 3000, nothing appears because we have not imported the components in the entry point of the app that lies in the home route of the index.tsx file under the features directory.
Displaying the result
Head over to the features directory and copy-paste the code in the Home folder of the index.tsx file.
src/features/Home/index.tsx
import { useState, useEffect } from "react";
import { useAuth } from "@pangeacyber/react-auth";
import { nanoid } from "nanoid";
import Search from "@src/components/Search";
import NotesList from "@src/components/NotesList";

interface Note {
  id: string;
  text: string;
  date: string;
}

const Home = () => {
  const { authenticated, user } = useAuth();

  const [notes, setNotes] = useState<Note[]>([]);
  const [searchText, setSearchText] = useState<string>("");

  useEffect(() => {
    const storedData = localStorage.getItem("notes");
    if (storedData) {
      setNotes(JSON.parse(storedData));
    }
  }, [])

  useEffect(() => {
    localStorage.setItem("notes", JSON.stringify(notes));
  }, [notes])

  const addNote = (text: string) => {
    const date = new Date();
    const newNote: Note = {
      id: nanoid(),
      text: text,
      date: date.toLocaleDateString(),
    };
    const newNotes = [...notes, newNote];
    setNotes(newNotes);
  };

  const deleteNote = (id: string) => {
    const newNotes = notes.filter((note) => note.id !== id);
    setNotes(newNotes);
  };

  return (
    <div className="home">
      <div style={{ marginBottom: "16px" }}>
        {authenticated ? (
          <span className="success">Welcome, {user?.profile?.first_name}</span>
        ) : (
          <main className="warn">
            <h1>Your Notes, Anywhere</h1>
            <p>Stay organized and keep track of your thoughts with our simple and easy-to-use notes app.</p>
            <span>
              You need to be logged in to use this app.
            </span>
            <img src="https://images.pexels.com/photos/317356/pexels-photo-317356.jpeg?auto=compress&cs=tinysrgb&w=1200" alt="sticky notes" />
          </main>
        )}
      </div>
      {!!user && (
        <div>
          <Search handleSearchNote={setSearchText} />
          <NotesList
            notes={notes.filter((note) =>
              note.text.toLowerCase().includes(searchText)
            )}
            handleAddNote={addNote}
            handleDeleteNote={deleteNote}
          />
        </div>
      )}
    </div>
  );
};

export default Home;
This code snippet does the following:
The
useAuthfunction is initialized. The function is used to authenticate and check if the user is signed in and authenticated. If otherwise, it prompts the user to sign in before seeing the notes pageThe local storage API is used within the
useEffecthook to store and retrieve data on the client side, which means the data persists in the browser even on browser reloads
Conclusion
In this tutorial, you've learned how to use the Pangea AuthN service to create a login and signup page that grants access to a page with the correct email and password combination.
Also, there are other services you can pair with the AuthN service to this app, like Vault, which allows you to view your secrets, keys, and stored Pangea Tokens in a familiar directory-style view. This service will keep your environment variables safe instead of being mistakenly pushed to GitHub.
PS: I faced a major challenge when using the Vault service, as I got this error multiple times.
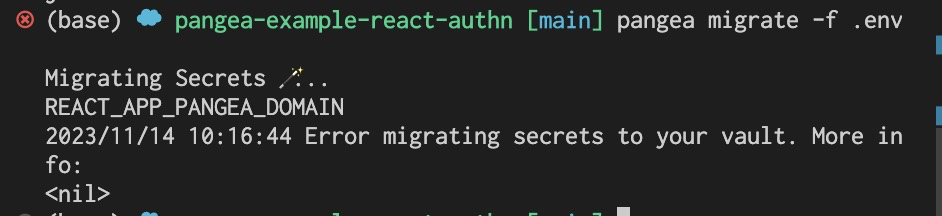
Special appreciation goes to Pangea Cloud and Hashnode for this Securathon.


