How to create a proxy server on Heroku

Teri Eyenike is a software developer with 3+ years of experience in web development and technical writing based in Lagos, Nigeria.
I am a software developer and technical writer that builds products with modern technologies and treats content as a product.
When he is not coding or writing, I love to do street photography with my mobile, kayak, and travel to see the world.
Say hi to him on Twitter at @terieyenike
The Cross-Origin Resource Sharing (CORS) Error

Have you ever seen this before?
This error occurs when working with APIs in your application code, and these bugs creep up every time you are trying to call the origin from another URL. The CORS errors stem from a security mechanism that the browser implement called the same-origin policy.
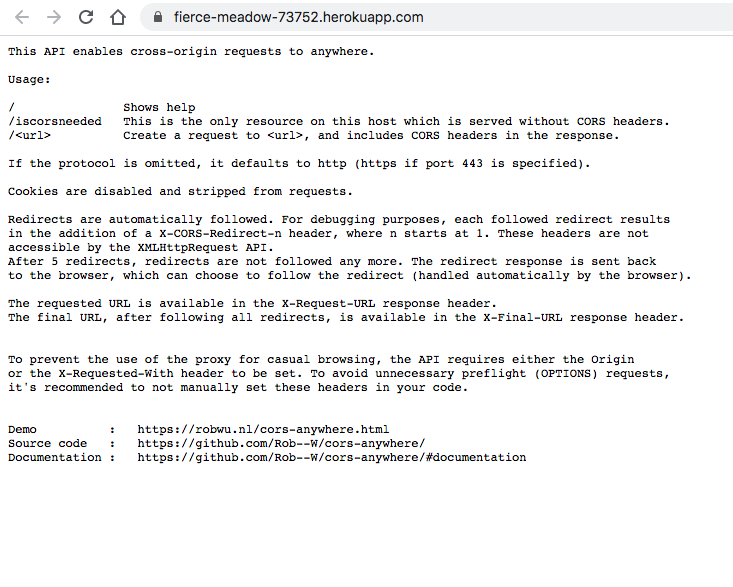
In this article, we are going to create our proxy CORS server hosting it on Heroku and having access to it anytime we need it instead of using the generally hosted public URL used by everyone, here on this URL, https://cors-anywhere.herokuapp.com/
Prerequisites
In creating our proxy server, you would need the following to be installed on your computer.
Install the Heroku CLI. For macOS, you can use homebrew. Visit heroku-cli for installation guides for your respective OS.
Install Node. Visit nodejs for installation guides.
Basic git version control skills
Step by Step guideline on creating a proxy server
- Clone this repository to our local machine.

cd into the cloned repository and run npm install to install on the dependencies for the project.
Log into Heroku from the terminal.

After logging in from the terminal, follow the prompts from the opened browser to your Heroku account.

- Create an app with the command heroku create

Once your new app is created, before any code has been deployed, Heroku will display a generic message with the deployed URL which can now be exchanged for the universal cors-anywhere URL.

- The last thing to do now is to push your newly created proxy server to Heroku

Conclusion
The CORS errors can be the bane of the frontend developer. But in this guide, we were able to spin up a proxy server from scratch using a Heroku server and basic git commands.
With these fixes, you'll never have to break a sweat overseeing the red CORS error in your browser and you can confidently now have an error-free connection as a frontend developer.
Here is a useful resource related to CORS


