


Every day new websites are built and published on the internet, and as developers, we are the ones who implement the strategies for the building of mobile and web applications.
So what is next after you have built this beautiful application?
Deployment to a live server.
It’s the icing on the cake.
Without this, your website will continue to live on localhost, which is not suitable for you, as you want to showcase your skills and that you are indeed a full-fledged developer 🚀.
This article will explore how our React application can be deployed on Heroku using Buildpack.
Prerequisites
To complete this project, we need to do the following:
Have NodeJS installed on our computer. After installation, npm, a node package manager, is made available to install dependencies.
Git - a free and open-source distributed version control system (VCS)
Let's get started with the steps on achieving the build process to production.
Step 1: Create a New App on Heroku

We will begin the build process by registering our new app on Heroku. This article won't be going into details on creating a GitHub repo. Instead, we will use a pre-existing app available on our GitHub profile.
To learn more, visit the link here.
After clicking the link above, click on new and create a new app. Give your app a name and choose a region for your app to be hosted, as Heroku offers the hosting of front-end and back-end applications to servers.
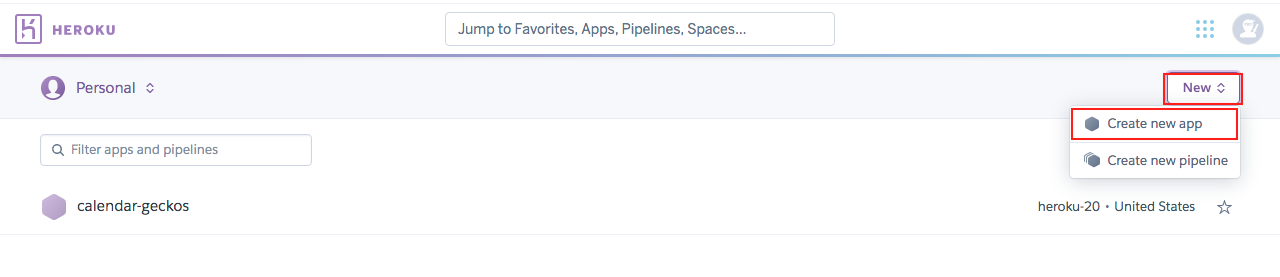
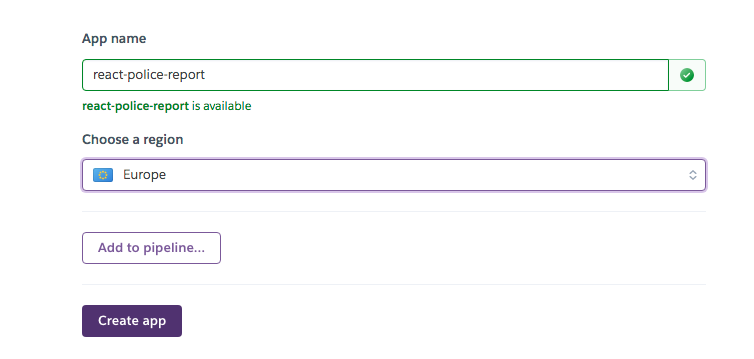
Make sure you click on create app to have a new site provisioned for you on Heroku.
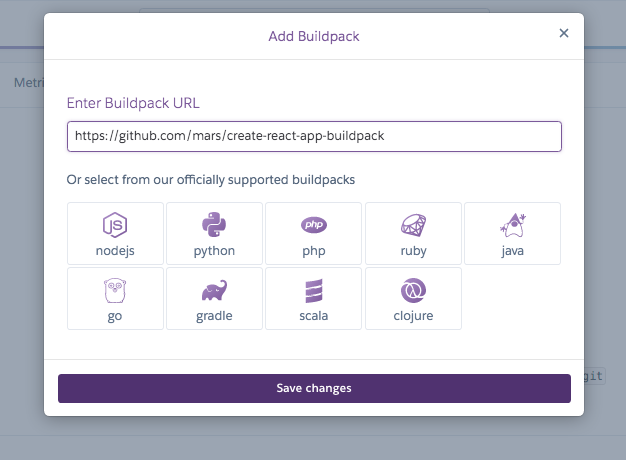
Step 2: Add Buildpack
The function of Buildpack is to deploy a React UI (generated from create-react-app) as a static website from our Heroku dashboard. Now, click on the settings tab and scroll down to add buildpack.


Once you click add buildpack, it displays a pop-up on the dashboard. Paste this link in the Enter Buildpack URL and click on save changes. That is all you have to do.
Step 3: Connect to GitHub
We will head over to the deploy tab to link and connect our repo to Heroku in this step. After that, click Connect to GitHub under the Deployment method.
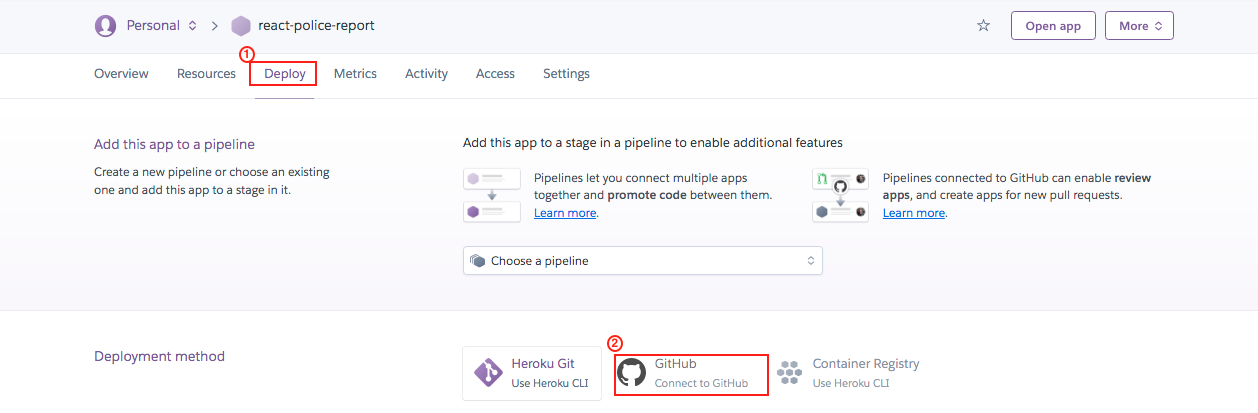
With the option to search for your GitHub repo, search for the repo you wish to deploy and connect.

Step 4: Automatic Deploys
In this step, we want to enable automatic deployments for the app from GitHub. What Continuous Integration(CI) does is that it helps us to check that no wrong or buggy code gets pushed to production. In addition, whenever we push a new code to GitHub, Heroku gets to know about the latest changes and automatically updates the website accordingly.
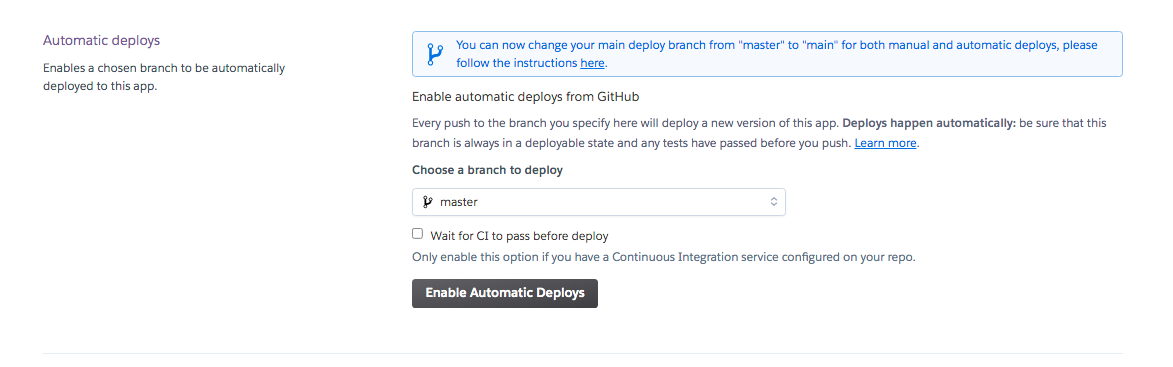
Check the Wait for CI to pass before deploy and click Enable Automatic Deploys in the above image.
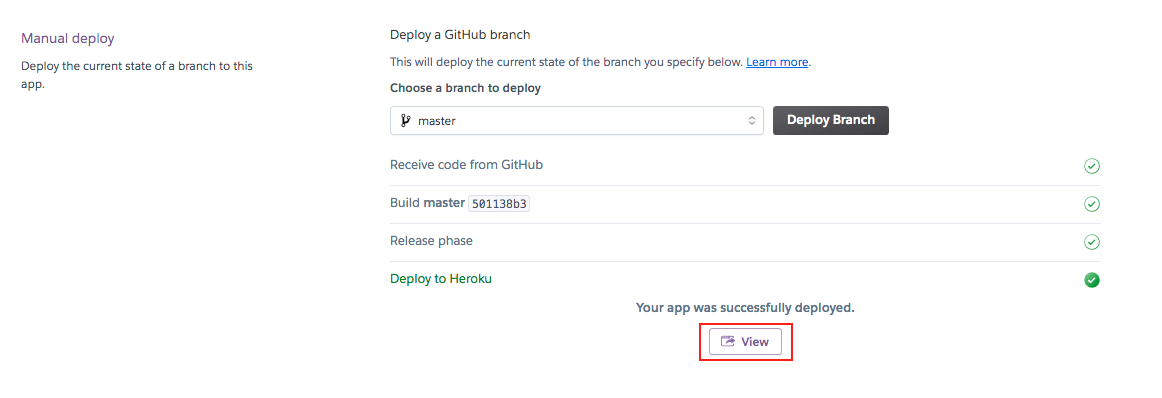
Step 5: Deploy the GitHub Branch
The last step is to start the build process. Click on the Deploy Branch button as this will compress all the files and organize them so that a particular build can be delivered and the app pushed to production.

Show Time
Let's view our project on the world wide web.
Want to have a sneak peek at the deployed live project? View it here, and access the GitHub repo here.